Eyepiece lens magnifies the image of the specimen. This part is also known as ocular. Most school microscopes have an eyepiece with 10X magnification.
2. Eyepiece Tube or Body Tube
The tube hold the eyepiece.
3. Nosepiece
Nosepiece holds the objective lenses and is sometimes called a revolving turret. You choose the objective lens by rotating to the specific lens one you want to use.
4. Objective Lenses
Most compound microscopes come with three or four objective lenses that revolve on the nosepiece. The most common objective lenses have power of 4X, 10X and 40X. Combined with the magnification of the eyepiece the resulting magnification is 40X, 100X and 400X magnification. Total magnification is calculated by multiplying the power of the eyepiece by the power of the objective lens. (10X Eyepiece X 40X Objective = 400X Total Magnification) Some more advanced microscopes have an additional objective lens with 100X power. This results in 1,000X magnification. So where do you start? Which objective lens do you need for a particular task? See “How to Use a Compound Microscope” below.
5. Arm
The Arm connects the base to the nosepiece and eyepiece. It is the structural part that is also used to carry the microscope.
6. Stage
The stage is where the specimen is placed. This place is for observation.
7. Stage Clips
Stage clips are the supports that hold the slides in place on the stage.
8. Diaphragm (sometimes called the Iris)
The diaphragm controls the amount of light passing through the slide. It is located below the stage and is usually controlled by a round dial. How to set the diaphragm is determined by the magnification, transparency of the specimen and the degree of contrast you wish to have in your image. Also called the condenser diaphragm.
9. Illuminator
Most light microscopes use a low voltage bulb which supplies light through the stage and onto to the specimen. Mirrors are sometimes used instead of a built-in light. If your microscope has a mirror, it provides light reflected from ambient light sources like classroom lights or sunlight if outdoors.
10. Coarse focus
Coarse focus moves the stage to provide general focus on the specimen. When bringing a specimen into focus, the course dial is the first one used.
11. Fine focus
Fine focus moves the stage in smaller increments to provide a clear view of the specimen. When bringing a specimen into focus, the fine focus dial is the second one used.
12. Base
The base is the main support of the microscope. The bottom, where all the other parts of the microscope stand.
Quizlet and Kahoot! Microscope Parts Links
Study guides and help with learning the parts of a microscope can be found here:
Quizlet Microscope Parts
Kahoot! Microscope Parts
Microscope Parts Flashcards and more
Microscope Parts Quiz
The 14 Parts of a Microscope
Sometimes microscope parts are listed as the 14 parts rather than the 12 parts as above.
If asked for the 14 parts of a microscope, it is generally because the three objective lenses are listed individually instead of as a group.
Here are the details:
All 11 Parts Listed Above - 12 minus #4 (Objective Lenses)
12. Low Power Objective Lens - generally 4x magnification
13. Medium Power Objective Lens - generally 10x magnification
14. High Power Objective Lens - generally 40x magnification
Other Light Microscope Parts
15. Oil Immersion Objective Lens - generally 100x
16. Rack Stop
17. Condenser Lens
The SmartMicroScope Optix could could be the part you're missing!
Replace the microscope eyepiece with the Optix microscope camera to:
Share the live image with the entire class and with virtual learners.
Prevent close contact by avoiding everyone sharing microscopes.
Take high resolution pictures
Record HD videos
Label specimen parts
Measure
Create quick assessments
Share images through Google Drive
Take pictures of labeled images to share as study guides or for formal assessments
How to Use a Compound Microscope
Using a light or compound microscope may seem overwhelming, but it’s really quite easy. Just follow these easy steps to explore microscopic views:
A. Place the slide on the stage and secure with clips
B. Center the specimen over the opening in the stage
C. Rotate the objective lenses to choose the low power lens (the shortest one)
D. Turn the Microscope Light ON
E. Rotate the Course Focus (larger dial) while looking through the eyepiece until the specimen comes into clear view
F. Adjust using the Fine Focus dial (smaller) to get a clearer image
G. Carefully rotate to the medium objective lens while keeping everything else the same.
H. Minor adjustments to Coarse Focus and Fine Focus may be necessary to get a clear image..
Still Using That Old School Microscope?
Bring Your Science Classroom into the 21st Century
We’re revolutionizing science classrooms with our microscopes and attachments. Want to learn how you can boost student engagement, and make science lessons interactive, collaborative, and fun?
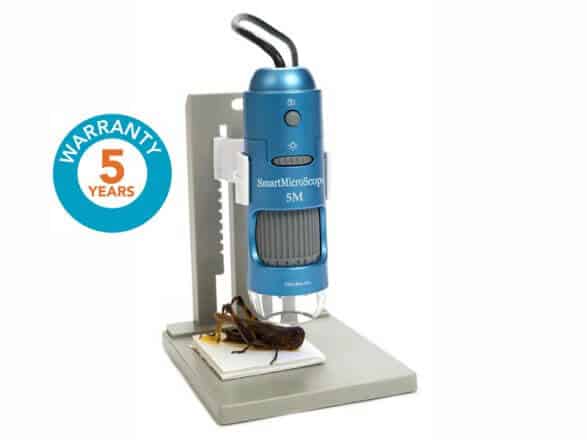
5M: The Classroom's Favorite Handheld Microscope
Take the whole class on a microscopic adventure (up to 200x). Our 5M handheld digital microscope makes science interactive, collaborative, and fun. No software install needed.
“It has been a wonderful asset to our space – the kids (and adults) love it!” – Avon Lake Public Library, Ohio ⭐️⭐️⭐️⭐️⭐️